Google Shopping Ads can be great. But getting them to the point where they can make money can be a real PITA.
They look pretty simple from the outside, but once you get started things quickly get technical.
Setting up a Google Shopping campaign in 35 minutes is ambitious.
But it’s do-able if you pay attention and if you’re a bit lucky 🍀😅.
Each section in this article has two estimates. The time it takes to read that section, and the time it takes to execute on it.
Those two together shouldn’t take more than 35 minutes to complete.
I’d love to hear if you’re participating in this challenge! Drop your store URL and the time it took you in the comments, I’ll send you something nice in return😎
Let’s jump right in!
Table of Contents
Game Plan
📝 Time to read: 1 minute
Here is what you’ll need:
- Your store platform
- Product feed: to send all your product info to Google Merchant Center
- Google Merchant Center account
- Google Ads account
All you really need to start is to have your products ready to go on the ecommerce platform of your choosing. (In this post, we focus on Shopify, WooCommerce, BigCommerce, Magento, 3dcart, but we’ve also got you covered if you’re on a different platform.)
The rest of the Google Shopping setup isn’t rocket science, but there are a lot of little details that trip you up and get in the way of launching an actual Google Shopping campaign.
In what follows, I’m assuming you have #1 covered. If not you should be busy doing that before reading on 🙂
Step 1 – Create a Product Feed
📝Time to read: 4 minutes
💪Time to execute: 10 minutes
A product feed is a file you need to provide to Google that contains all of your product information.
It is the hardest part of the Google Shopping setup process.
That’s because that product feed needs to be accurate and exactly according to the specifications of Google.
If you’re missing some data or didn’t 100% follow Google’s guidelines, your products won’t get approved and you won’t be able to move forward.
A good way to visualize a product feed is as a big spreadsheet where the rows are all of your products and the columns are all those fields that Google requires.

Most of them are pretty straightforward: product title, price, description, sku, link, brand, image link, etc.
But there are also a couple of fields that you might not have by default: google product category, gtin, mpn, etc.
You can find the full list in Google’s help docs.
The ease with which you can put this file together depends on the quality of your product data and on the ecommerce platform you are using.
Ecommerce platforms like Shopify, WooCommerce, Magento or Bigcommerce all have apps, plugins or extensions available to make the feed creation part easier.
The specific tool that you need depends on your specific situation, but the ones mentioned below should be enough to get started.
Google Shopping Setup on Shopify
Plenty of choices for Google Shopping apps in the Shopify app store:
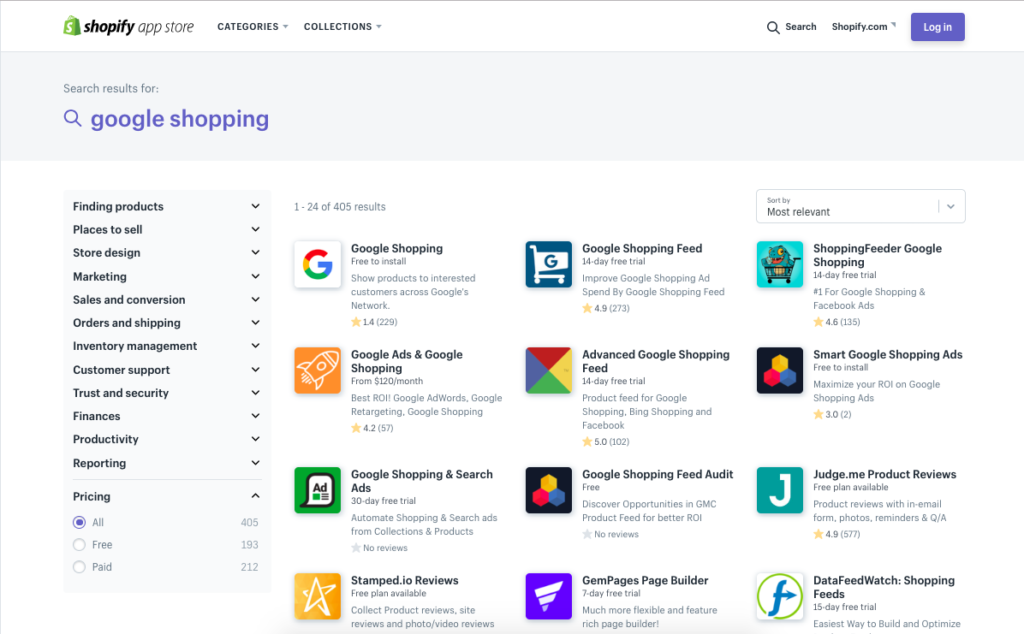
After neglecting their home-grown Google Shopping app for a couple of years, Shopify has made a lot of changes at how they integrate with Google Shopping.
I believe the app they have today is a really good fit for most Shopify merchants, especially those starting out.
So even if the poor ratings and scathing reviews don’t reflect it, I recommend this app:
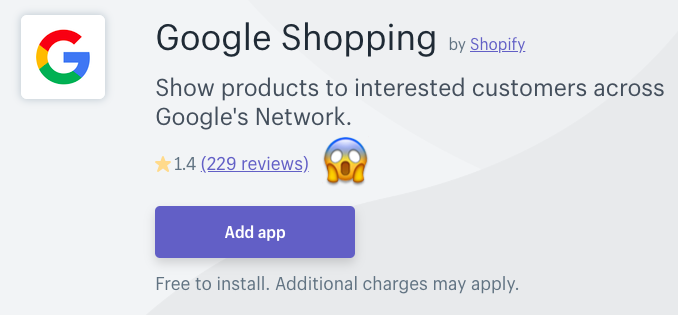
The great thing about the app is that as soon as you’ve installed it, it takes you through a setup wizard that will help you get everything configured.
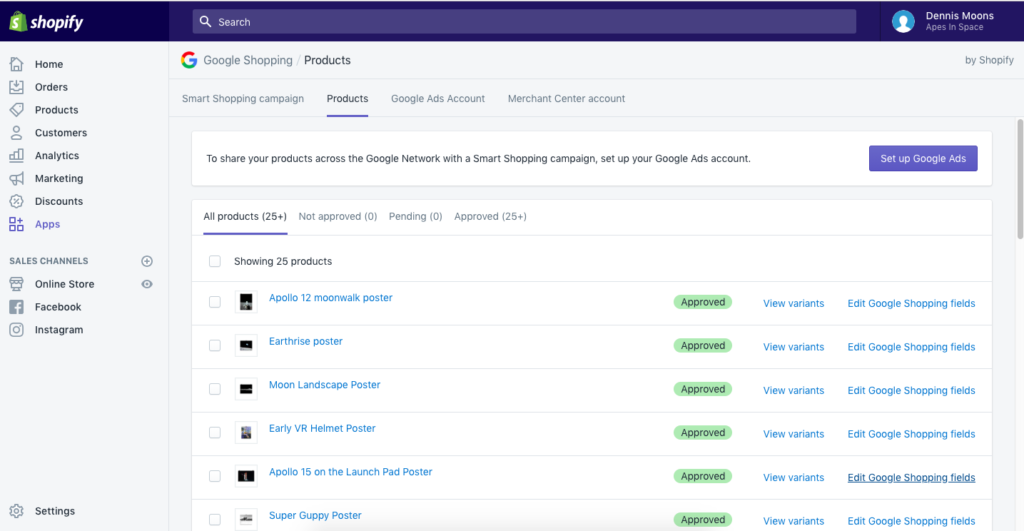
In the end, it will also help you to identify any errors and make suggestions for fixes.
One thing I want to warn you about is to stay away from the “Smart Shopping campaign” that Shopify & Google are promoting.
I’ll outline in Step 4 what it is, and why it’s not ideal if you want to get good results for your business.
Google Shopping Setup on WooCommerce
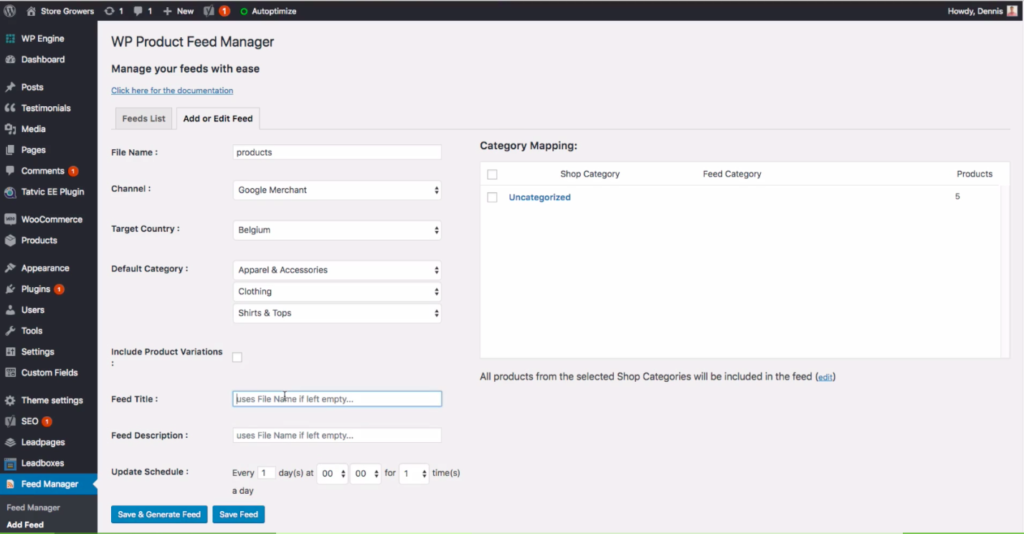
If you’re using WooCommerce, there are two plugins I recommend to create your product feed.
Most WooCommerce plugins will offer similar functionalities:
- Add extra product fields (for things like custom labels)
- Field mapping
- Category mapping
- Generate the actual product feed (an XML, CSV or txt file)
Some of these plugins will also double to generate product feeds for other channels like Facebook Dynamic Ads. So if that’s also on your list, make sure you select a plugin that can do both.
Google Shopping Setup on Magento
If you’re running your store on Magento, there are plenty of extensions available to generate a product feed:
If you’re not happy with any of the above, a lot of the more complex data feed management software tools also have their own Magento extensions: Channable (M2).
Google Shopping Setup on BigCommerce
If you’re running your store on BigCommerce you have plenty of apps that will support Google Shopping:
Google Shopping Setup on Other Ecommerce Platforms
If you’re running your online store on a different platform, you might have a little bit more work cut out for you.
Your goal is to get a .CSV, TXT or XML file with all of your products that you can upload to Google Merchant Center.
If all you can get is a product export, you’ll need to make additional tweaks to this file.
You can either do that manually in Excel or use a Google Sheet that automatically syncs with Google Merchant Center. These are really last resort options. Because it means that any change you make to your products: a price, change a title, a new product, etc; will also need to be made in these different documents.
Instead, I would use a tool that sits in between your product export and Google Merchant Center.
A couple of suggestions: GoDataFeed, Channable, DataFeedWatch and Sales&Orders.
Step 2 – Create a Google Merchant Center account
📝Time to read: 3 minutes
💪Time to execute: 10 minutes
Next, you need to set up a Google Merchant Center account.
If you don’t have a Google Merchant Center account yet, you need to create one first.
Setting up this account usually is pretty straightforward. You’ll need to claim your URL which proves to Google that you actually own the domain you want to advertise on.
If you have access to Google Analytics or Google Tag Manager, you can use those to verify ownership. If that doesn’t work, try the meta tag option, where you’ll need to add a small meta tag to your website’s HTML code.
Configure Shipping Settings
Google Shopping often displays the shipping price right in your product ad.
So you have to provide them with the correct information about shipping rates, minimum order limits, etc. This happens in the Shipping section of Google Merchant Center.
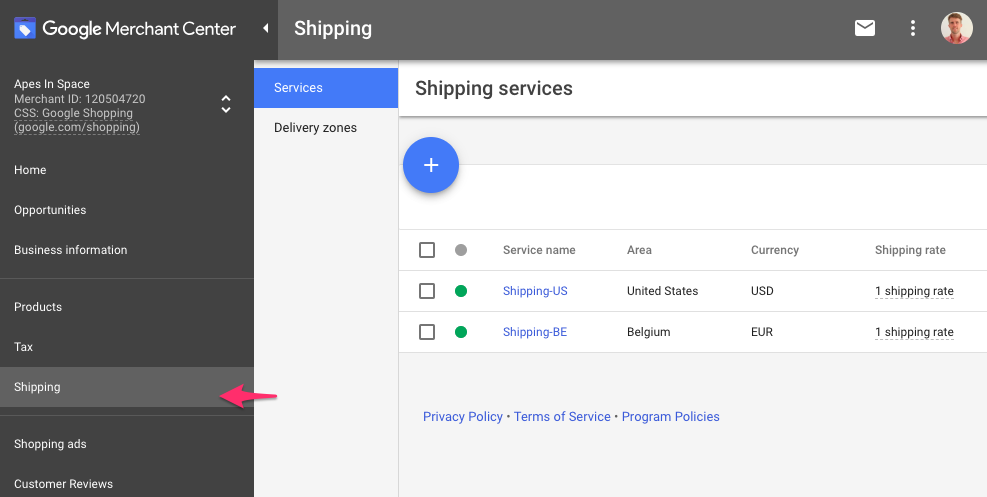
You first have to create a Shipping service, which covers a specific area. Then within that service, you can define specific shipping rates:
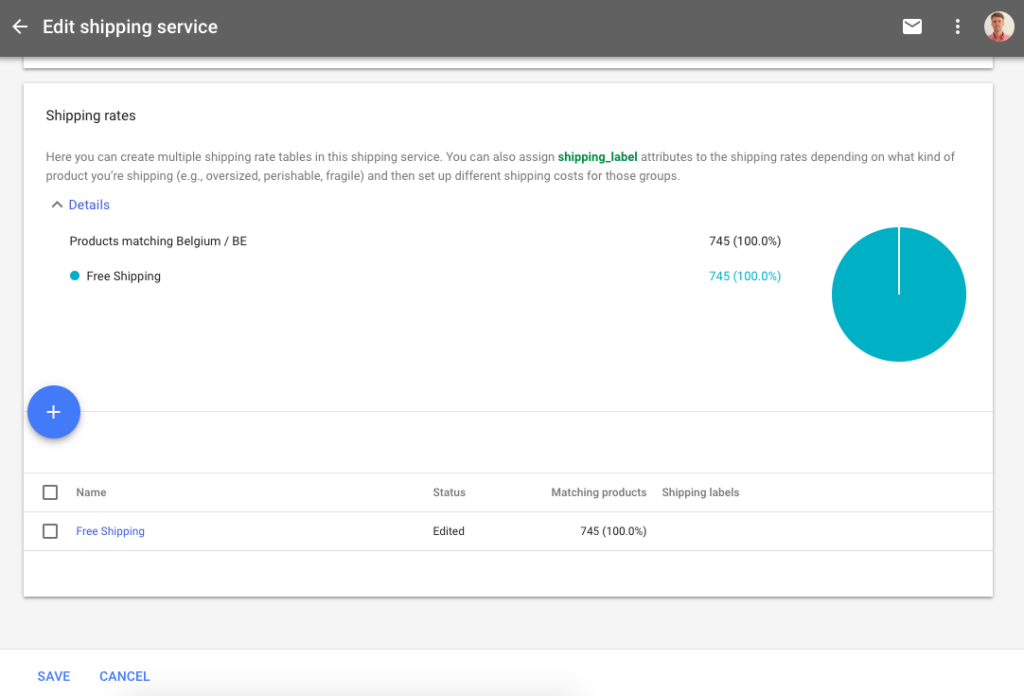
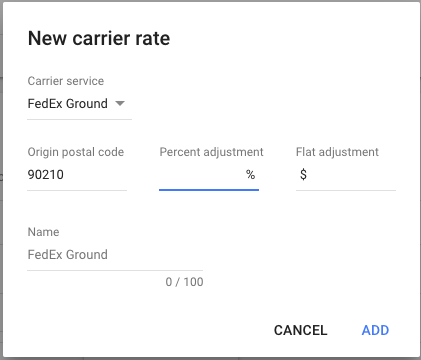
Google Merchant Center also supports more complex shipping calculators like those that depend on carrier rates from logistics providers like FedEx and UPS.
You can even mark up the prices with a flat fee or percentage:
Configure Tax Settings (US only)
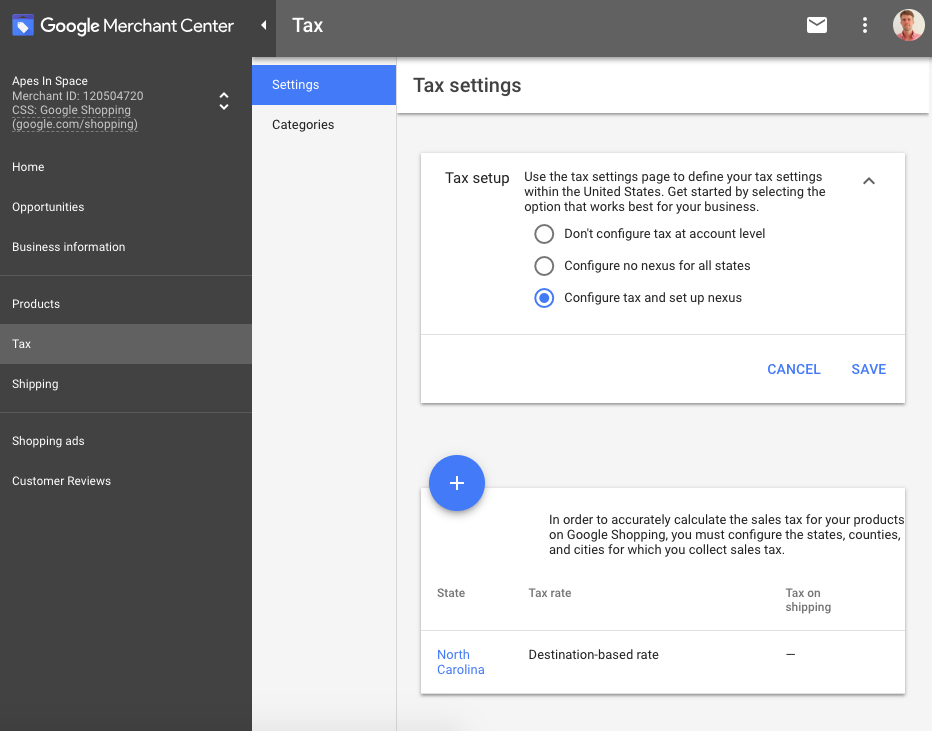
Configuring the right tax settings in Google Merchant Center is only necessary if you’re selling in the US.
If you’re selling outside the US, you’ll need to check the regulations on collecting sales tax. But you don’t need to provide those to Google.
For example, my fulfillment provider has a facility in North Carolina, therefore I need to charge sales tax for orders in North Carolina. Here is what that looks like:
Upload Your Product Feed to Google Merchant Center
Then you’ll be able to connect/upload your product feed that’s hopefully in good (enough) shape.
Note that some tools like Shopify connect to Google Merchant Center via its API. This means that the data is sent through automatically so you don’t need to upload any feeds.
Then Google Merchant Center will process the data, let you know what’s wrong so you can start troubleshooting your feed.
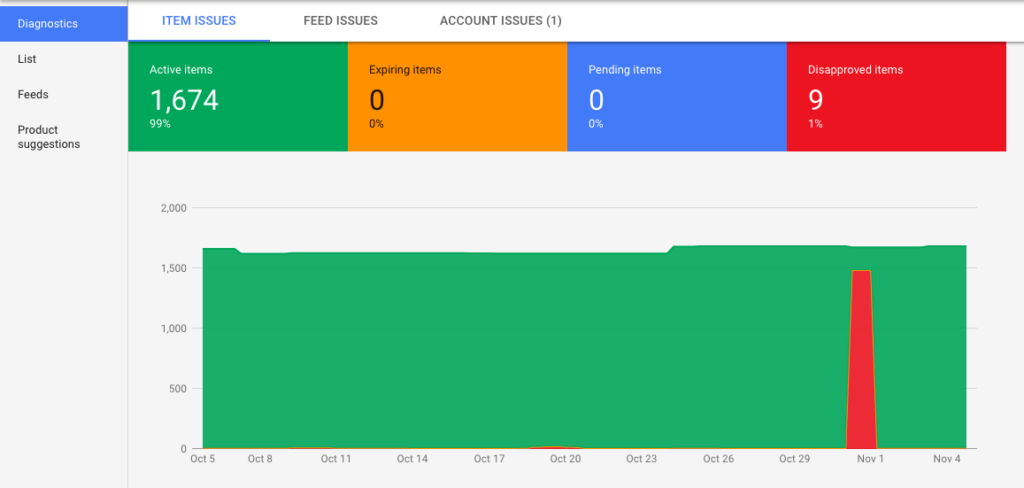
This is when the trouble often starts.
If things aren’t 100%, you’ll start seeing a lot of errors and disapproved products.
These errors and warnings indicate that there is missing or incorrect information, or that the information is not according to Google’s product data requirements.
Some of these errors and warnings are easy to fix, but others require you to look up (and add!) product identifiers to every one of your products.
This can quickly get very time-consuming.
So start with the most critical things: fix the account and feed errors as fast as you can. If not treated, these can result in an account suspension.
Then tackle the item-level errors. They are necessary because they will cause your products to be disapproved, which means they won’t show up in Google Shopping.
To tackle any problems, have a look at this post that is dedicated to helping you fix the errors in your google shopping feed.
To make bulk changes to your product feed, like adding product categories, you can use Feeds Rules in Merchant Center or tools like the data feed management software providers mentioned in the product feed section.
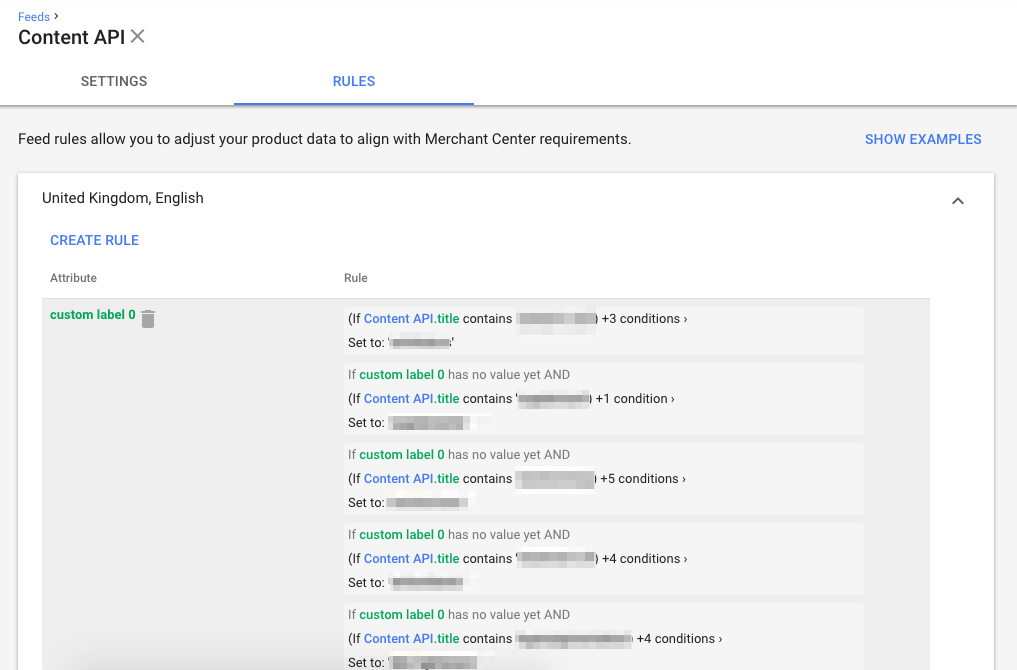
Going through all of these problems might seem tedious now but it will help you to get better results and increase the visibility for your products.
Step 3 – Create a Google Shopping Campaign
📝Time to read: 2 minutes
💪Time to execute: 5 minutes
As soon as your products are approved in Google Merchant Center, you can finally set up a Google Shopping campaign.
If you don’t have a Google Ads account yet, go sign up for one.
Go through the configuration wizard to enter your business and payment details.
You’ll also be prompted to start setting up a campaign. Just fill in random data to get out of this menu. Then make sure to pause that dummy campaign you’ve just created.
Before you can start promoting your products in Google Shopping, you’ll need to link Google Merchant Center to Google Ads.
Go back to Google Merchant Center, click the three dots in the top right corner and select Account linking.
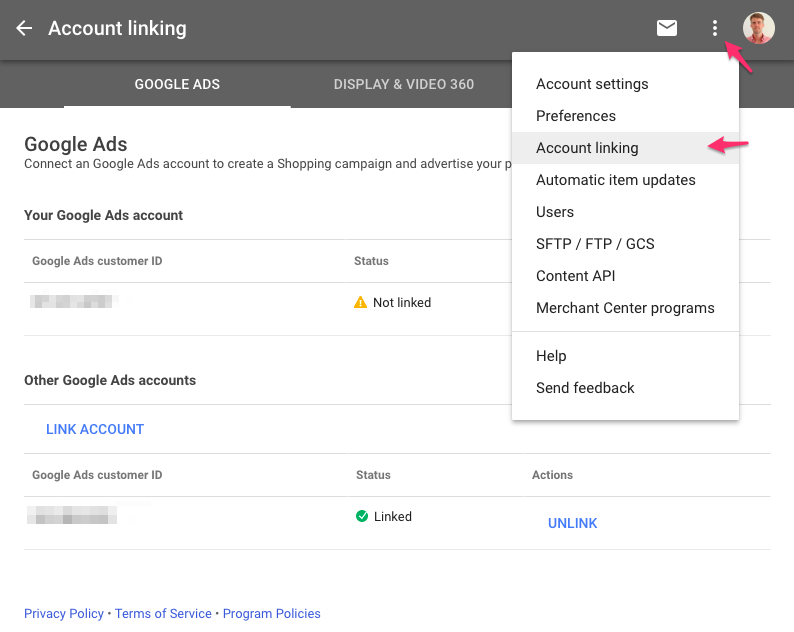
There you are able to add a new Google Ads account. Just enter your 10 digit Google Ads customer ID and you’re done.

Now you’re all set to create a new Google Shopping campaign. Just click the big blue plus sign.
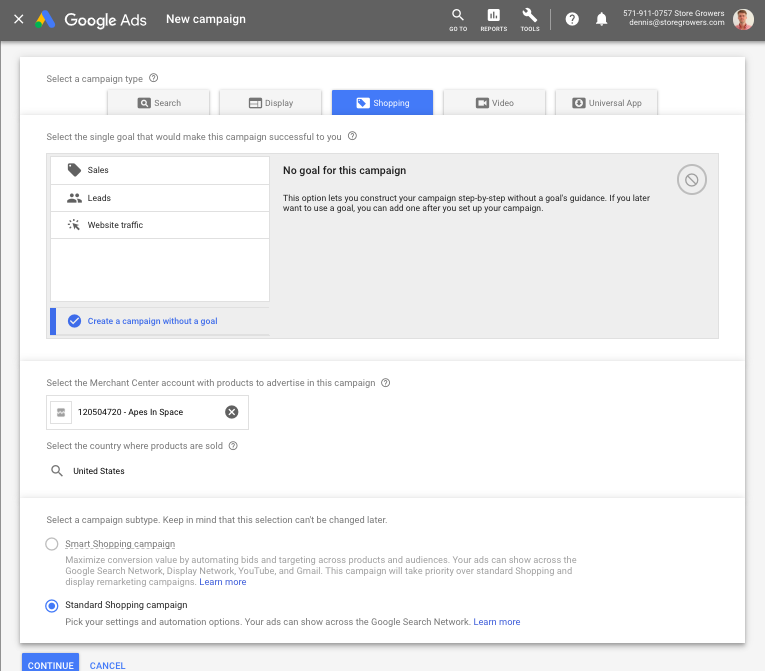
That will take you through all the steps to create a new campaign using the product feed we’ve set up in the previous section.
Most important in that process is to pick a small budget ($5-10/day) to start with, set a low cost per click (not above $0.5/click) and select Manual CPC as your bidding strategy.
After that, your Shopping campaign will start showing ads!

Improve Your Campaign Structure
If you’ve followed the approach above, all of your products will have the same maximum cost per click (or CPC).
Since not all of your products are equally valuable, you’ll need to create separate product groups and set different bids depending on margin, profitability or popularity.
By default, you can split your product groups based on brand, category or by item ID.
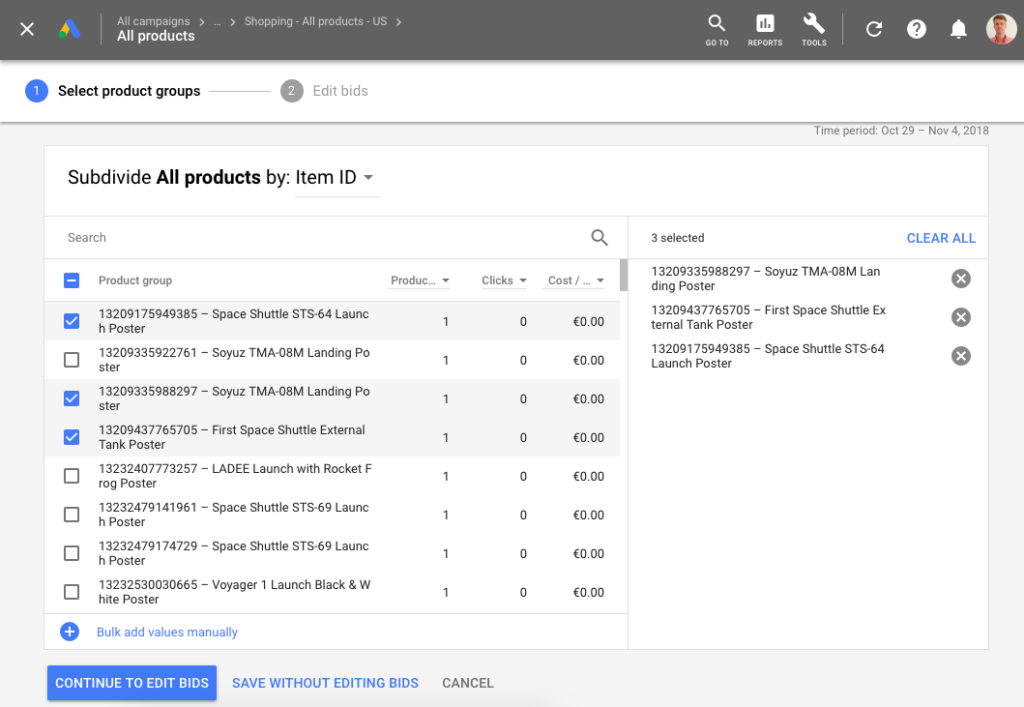
But if you want to set the bid according to margin, you’ll need to use custom labels to add that information to your product feed.
Step 4 – Optimize Your Google Shopping Campaign
Your Google Shopping campaigns should be live right now. So technically, we’re off the clock 🤓
There isn’t a lot you can do straight away anyway.
We can make a few minor changes to the campaign starting out. But the real impactful optimization requires data to act on. To get that data you have to run your campaigns for a bit.
Then usually you’ll see one of two things happen:
- Nothing (not even spending your budget)
- Most of your budget is being spent on one product or product group
Your goal is to make sales with Google Shopping, and at the start, you probably don’t know which products are going to do well.
So you want to make sure all of your products get some visibility in the search results before making decisions.
To do that, play around with budgets and CPCs. Increase CPCs for items that no or few impressions and clicks and decrease CPCs for the ones that get a lot of clicks.
To further improve your results, there are a lot of different things you can do. Here are some starters:
- Look through your Search Terms report to find irrelevant search queries and exclude those from your campaigns
- Check if your products are appearing for generic rather than product-specific search queries.
- Improve your product feed to make sure the most profitable products get the budget they need
- If you’re running multiple Shopping campaigns, make sure you get the campaign priority right
For more ideas, check out our google shopping optimization guide.
What’s Next
Out of all the steps described above, getting your product feed together is probably the biggest hurdle to getting started with Shopping Ads.
Afterward, the work in Google Merchant Center and Google Ads is pretty straightforward.
With most of my students, I see the same, the setup process is the biggest hurdle.
That’s why I’m giving away a Google Shopping checklist. It’s part of my premium course and it will list all the steps you need to take to get your campaigns up and running in no time.
