Google Merchant Center (also called GMC) is the hub to manage your product feeds.
If you want to run Google Shopping ads, it’s an essential part of the setup process.
And most of the time, that’s all the attention it gets. Fix the product feed, connect with Google Ads and move on.
But if you never come back to Google Merchant Center, you’re probably leaving money on the table.
So in this article, I’d like to show you a couple of underused features that you can use to optimize your product feed and improve your Google Shopping campaigns.
Here is what I’ll cover in this article:
1. Feed Essentials
These are the features you’re probably most familiar with as they are required in order to get started.
After verifying your website, you need to submit your Google Shopping feed (a list of all your product details).
There are three ways to do this. The best one for you depends on your ecommerce platform, your technical expertise and your fondness for manual labor:
Option 1: Plugin /extension / app
If you’re running your store on a popular platform like Shopify or WooCommerce, you’ll have plenty of options to choose from.
Popular picks:
- Shopify‘s Google Shopping App
- WooCommerce Product Feed PRO
Check out more options here.
Some of these tools will use the Google Merchant Center API. This simply means that your product data will be automatically transferred to the right place. Easy right?
If your app doesn’t connect to GMC, you’ll probably get a feed URL. Read on to learn what to do with that.
Option 2: Upload your own feed
If you need to upload your own feed to Google Merchant Center, you’ll need to make you are submitting all the values in the correct format.
Tip: if you’re using the manual upload or Google Spreadsheets, I highly recommend you to start with a test feed. If you use the standard feed and are a bit slow to fix any errors that pop up, you run the risk of getting your account suspended!
A test data feed allows you to discover mistakes and fix them before everything is “submitted for real”. Afterward, you just need to upload it to the standard feed.
Option 3: Google Spreadsheets
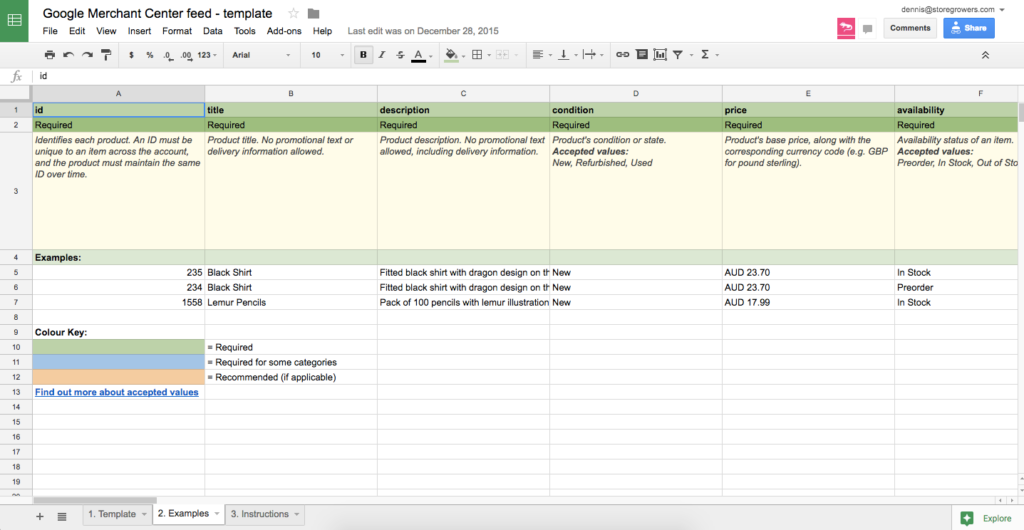
This last option is the most manual one. Google Merchant Center gives you a product feed template with some instructions on how to fill in all of your information.
Since you’ll have to update this file every time a product changes, I recommend this for smaller online stores with only a few products that rarely change.
One of the most important things about your data feed is that it stays up to date. So picking an option (1 or 2) that does this automatically is a huge advantage.
2. Setting Shipping Settings
Besides uploading your product feed you also need to provide Google Merchant Center the details about the shipping and tax settings of your store.
You can either do that on the product level or store-wide. I prefer this last one as you’ll only need to make one change when something changes like a free shipping promo or new minimum free shipping amounts.
Just be sure to keep this up to date. Because the shipping cost or free shipping notification can show up in every ad. So if you still have outdated information in there, you might be driving clicks to your competitors.
Take a look at the sidebar Google Shopping ad below:
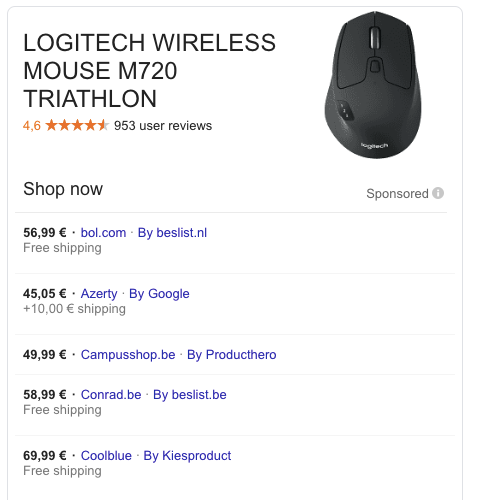
The prices are pretty different, but notice the impact of that “Free shipping” or “+ €10 shipping”. Those are pretty likely to influence where someone clicks.
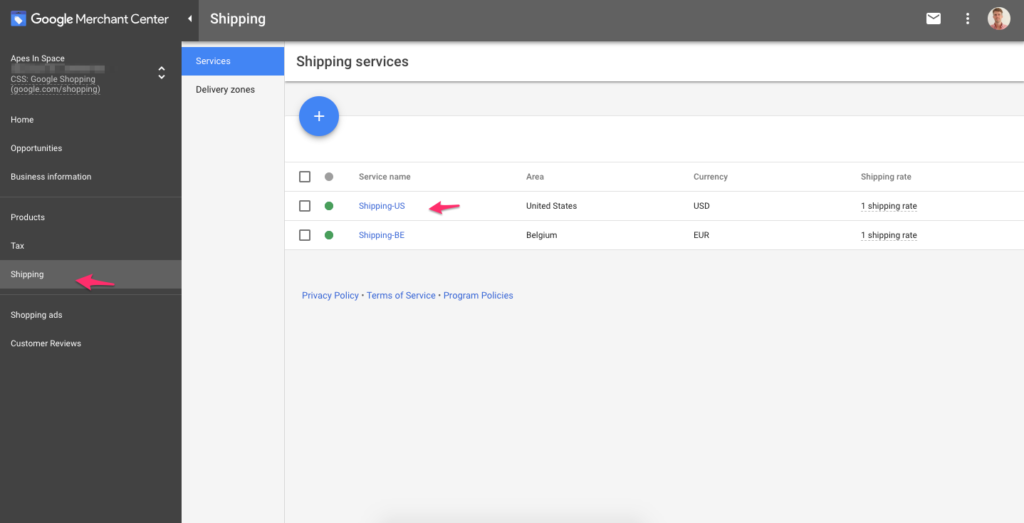
At you might have no idea this is happening, so go to the Shipping settings in Google Merchant Center and verify that the information is up to date:
3. Google Merchant Center Diagnostics
Once your data feed is uploaded, there is a pretty big chance that you’ll discover a lot of errors like missing product numbers, missing categories or incorrect data formats.
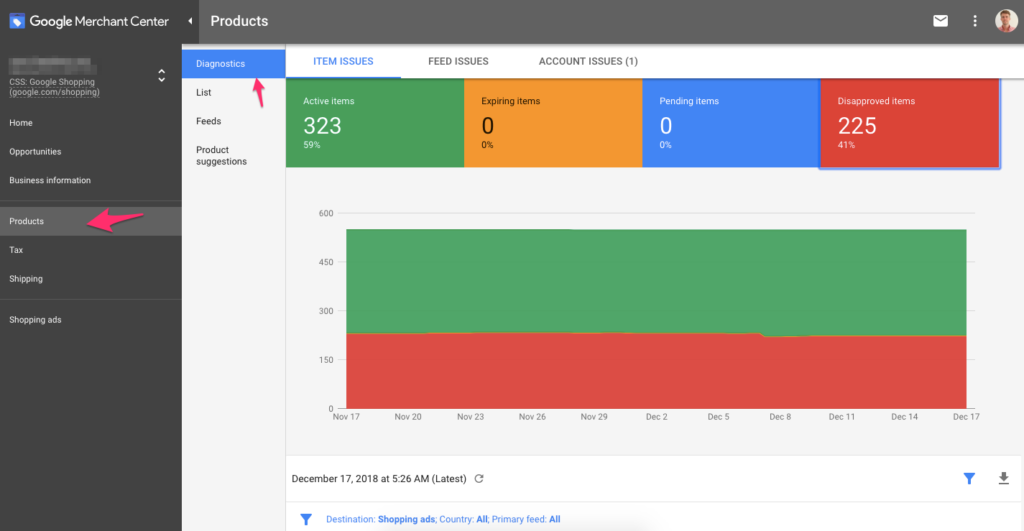
To handle these issues, Google Merchant Center has a special section called Diagnostics. It will tell you exactly what and where all the problems are happening.
You’ll see two kinds of issues: errors and warnings.

Errors are things you absolutely need to fix before you can appear in the Shopping results. Warnings mean that ads for these products can still show up, but they will be limited in their visibility.
So while the errors are essential to even show up, the warnings are where you can make the difference and maximize the potential of the products in your feed.
Let’s take a look at the 3 different levels of issues you’ll find in Diagnostics.
1. Account issues
Account issues affect your entire Google Merchant Center account.
These are the most fundamental problems in your account like the link between Google Ads and GMC, URL verification problems or policy violations.
2. Feed issues
If there’s any problem with uploading, fetching or validating your product feeds, you’ll see errors and warnings pop up in the feed level section.
The most common problems are missing credentials, problems with the file format or a feed that has expired.
3. Item issues
If all the above issues are taken care of, you’re left with the specific issues of your products.
These are usually missing or incorrect attributes, or policy violations (like a different product price in your feed compared to on your store) or wrong in/out of stock handling.
If you forget a specific attribute for all of the products in your feed, you’ll see a lot of errors pop up. So normally you need to fix them one by one. You can fix these problems in bulk with Feed Rules.
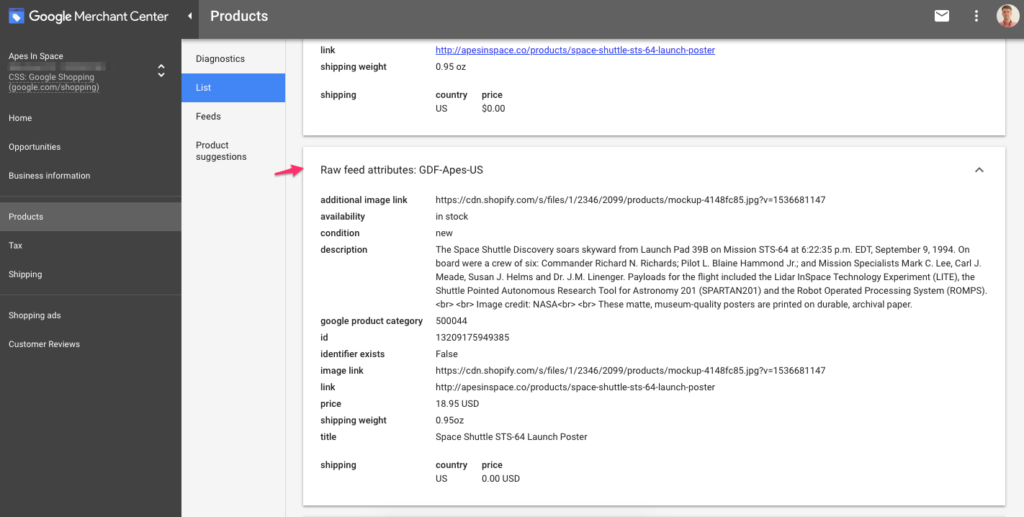
Tip: Check the Products > List section in Google Merchant Center and click on one of the products you see there. Then expand the “Raw feed attributes” section, to see the actual information that’s included in your product feed.
4. Feed Rules
One of the least known features of Google Merchant Center is called Feed Rules.
These rules allow you to add or modify specific information to the data feed that’s coming out of your ecommerce platform:
Ecommerce platform > Google Merchant Center > Feed Rules > Google Ads
With Google Merchant Center Feed Rules you can:
- Fix errors in your shopping feed
- Make bulk changes to your feed
- Optimize your feed with things like custom labels
It’s ideal to make small changes to your data. But if there are a lot of things to fix, it’s best to do it in your ecommerce back-end.
In case you can’t get access to the actual feed or can’t make changes to it, feed rules are a life-saver. There have been a couple of cases where I’ve set up temporary fixes via Feed Rules before I could convince my client to make the actual changes in their own data.
Feed Rules is great if you:
- have a small number of products
- don’t need to make a lot of changes
- only use your feed to advertise on Google Shopping
The Feed Rules feature keeps getting better, but you might run into its limitations. In those cases, I want to give you some alternatives:
Google Merchant Center Feed Rules Alternatives
If any of these doesn’t match your store, it’s time to look at more advanced data feed management tools like GoDataFeed or Channable.
Many of them will do a lot of the heavy lifting to get your feed in the right format. And they have a lot of extras for you to adapt and optimize your product feed even further.
Another advantage is that they support multiple shopping channels, like Bing Product Ads or Facebook Dynamic Ads. That means you connect your store, make the tweaks once and then connect it to all of the channels.
The downside is that with most of these tools you’ll pay a monthly fee. But most of them are well worth their money in terms of time and opportunity cost savings.
5. Merchant Promotions
Merchant Promotions allow you to show special deals or offers right in your Google Shopping ads. They are kind of an Ad extension for Shopping ads.
You need to provide the details, but it’s not guaranteed that they will come through. If the promotion does come through, here is what that looks like:
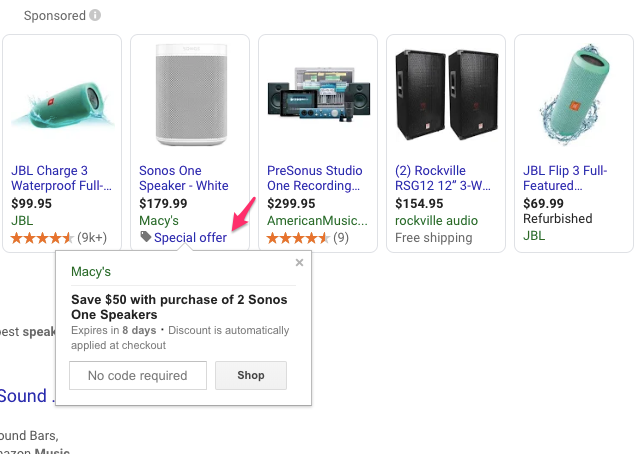
Note that a Merchant Promotion is different from the “Free shipping” or “Price drop” notifications.
They currently are only supported for advertisers in Australia, Germany, France, United Kingdom, India and the United States.
If you’re in one of these countries, here is how to enable them in your account.
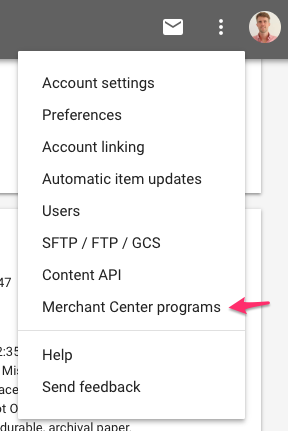
Click the three dots in the top right corner, then select Merchant Center programs:
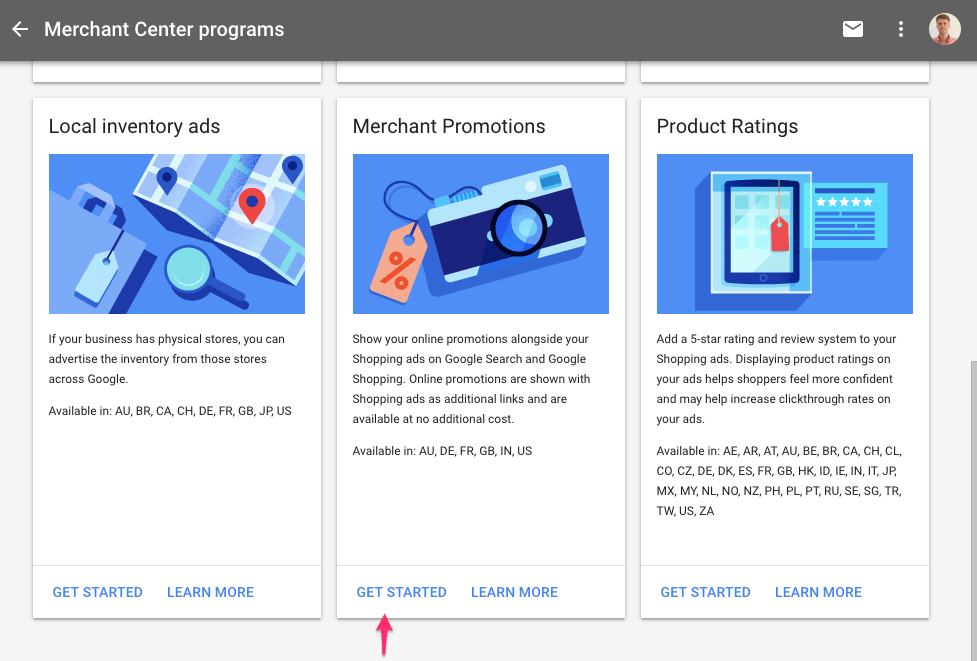
Then scroll down, find the Merchant Promotions and click “Get started”:
That will take you to an application form. Once you complete that, your account will be approved and you’ll know pretty quickly if you can start with these promotions.
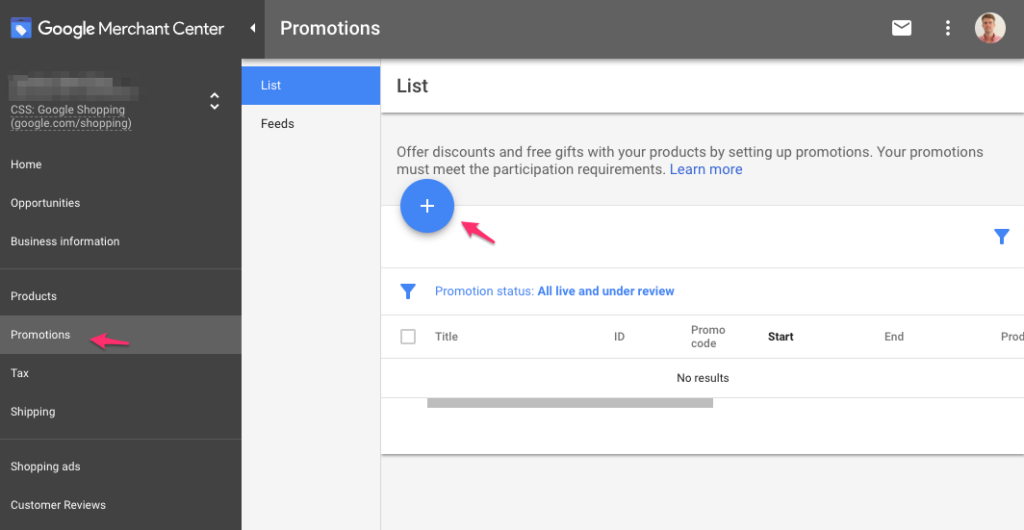
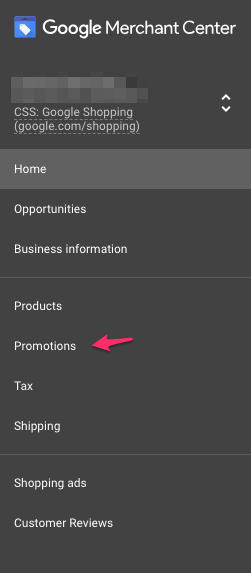
If you get approved, you’ll see a “Promotions” menu item in the left sidebar of your Google Merchant Center account:
That will give you access to the section where you can manage individual promotions or promotions feeds:
You can get away by setting up Google Merchant Center once and never looking at it again.
But I hope this post has convinced you to take a better look at this tool and experiment with some of the features mentioned in this article.
Let me know in the comments which one you’re curious to try in your account!
