If you’re running Google Ads campaigns, you need to have some kind of conversion tracking in place.
Without accurate information, you might know that your ads are doing “something”, but you don’t really know what.
If you don’t have any confidence about how your ads are contributing to sales, you’re going to be very reluctant about spending more. Which puts a limit on the type of results your ads can produce.
So in this article, I’ll show you how to set up Google Ads conversion tracking in.
This will enable you to see exactly which campaigns and keywords are driving sales, and which are just costing you money!
Table of Contents
Google Analytics vs Google Ads Conversion Tracking
There are two ways to set up conversion tracking inside of Google Ads:
- Import Google Analytics transactions
- Use the Google Ads conversion tracking code
They are both valid ways of tracking conversions, but there are some differences between how both systems record a conversion.
Here is an overview of the differences:
| Google Ads | Google Analytics | |
| Conversion source | Google Ads conversion tracking tag | Google Analytics tracking code |
| Date of transaction | Date and time of ad click | Date and time of transaction |
| Counting method | Option: One / Every | All |
| Invalid clicks | Filtered | Not filtered |
| Cookie expiration | 90 days after a click | Up to 2 years after a click |
| Time delay | No delay | Within 12 hours (last click) Within 24 hours (other attribution models) |
| Default attribution model | Last click | Last non-direct click |
So if you’re wondering why there is a difference in conversions between Google Analytics and Google Ads, the table above gives you the answer.
It can’t hurt to add both methods, but after that, it’s best to stick to one of them.
Which Method should you pick?
Starting out, I used to recommend that advertisers use import Google Analytics transactions. The main reason for that is that it is usually easy to configure (or rather hard to screw up).
Lately, I changed my approach a bit.
- If you aren’t technical, don’t have access to a developer, stick with the imported conversions from Google Analytics
- If you read the article below and it seems do-able: go for the native Google Ads conversion tracking
This last one offers a little bit more data to optimize your campaigns with. And it also allows you to use different attribution models in a more accurate way.
Creating A Conversion Action
After you’ve picked your preferred method, you need to create a conversion action.
Go to Tools & settings, Conversions, and click the big blue plus sign.
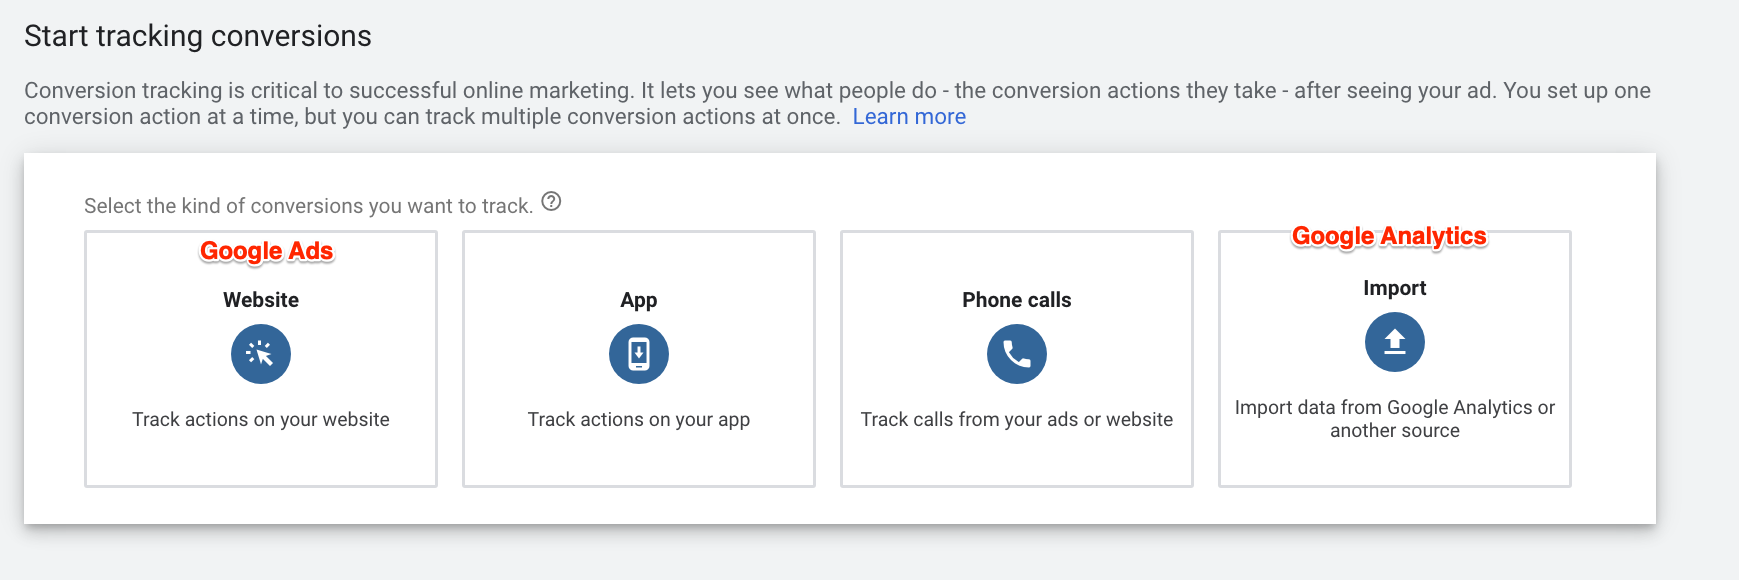
I’ll first cover Google Ads conversion tracking and then look at Google Analytics.
To create a website conversion action, click Website.
Then you’re presented with a few options.
Category
Pick the ones that best reflect the conversion you want to record. This doesn’t have any impact, it just allows you to segment different categories in reports.
So for now, we’ll pick Purchase.
Value
Our goal here is to track sales, and since each of those sales has a different value, we’re going to send the value dynamically.
So pick “Use different values for each conversion”.
Count
This is the first option that’s a bit less intuitive.
If someone clicks your ad, converts, and then 5 minutes later purchases again.
Do you want to track 1 or 2 purchases?
2 right? So select “Every”.
The other option “One” can be used on lead generation campaigns. Someone can only sign up once to your email list.
Note: this is related to the repeat rate, which we’ll cover towards the end of this article.
Click-through conversion window
The click-through conversion window is how long a conversion can be recorded after someone has clicked on your ad.
The default is 30 days.
For example: So if someone clicks your ad and converts after 14 days, that’s counted as a conversion. If they convert 31 days after they’ve clicked, it’s not counted.
View-through conversion window
The view-through conversion window is how long a conversion can be recorded after someone has seen your ad.
Note that this type of view-through conversion is triggered after a mere impression, not a click.
The default here is 1 day.
You won’t use this much in Search or Shopping campaigns, but it can be useful with Display or YouTube Ads.
Include in “Conversions”
If you check this box, this conversion action is included in the Conversion column.
This means that it will be used by any type of automated bidding strategy.
If you don’t have any conversion actions in your account yet, check this box. If you have, make sure that there are no other conversion actions that are tracking the same thing enabled.
For example: if both your Google Ads conversion tracking and imported Google Analytics transactions are included in the Conversions column, you’ll be double-counting conversions.
Attribution model
Here you can set the attribution model of the conversion action.
Picking the right attribution model is a whole other rabbit hole, so for now, let’s use the default “Last click” model.
If you’re interested in learning more, check our article on attribution models.
Installing The Conversion Tag
Next, you have to add the tag to your website.
It’s not super complicated, but you will need to fool around with HTML & javascript. So if you’re not familiar with that, get your developer involved.
There are three main ways to implement it:
- Embed your website’s template
- Using Google Tag Manager
- Use a third-party plugin/app
Let’s have a closer look at all three methods.
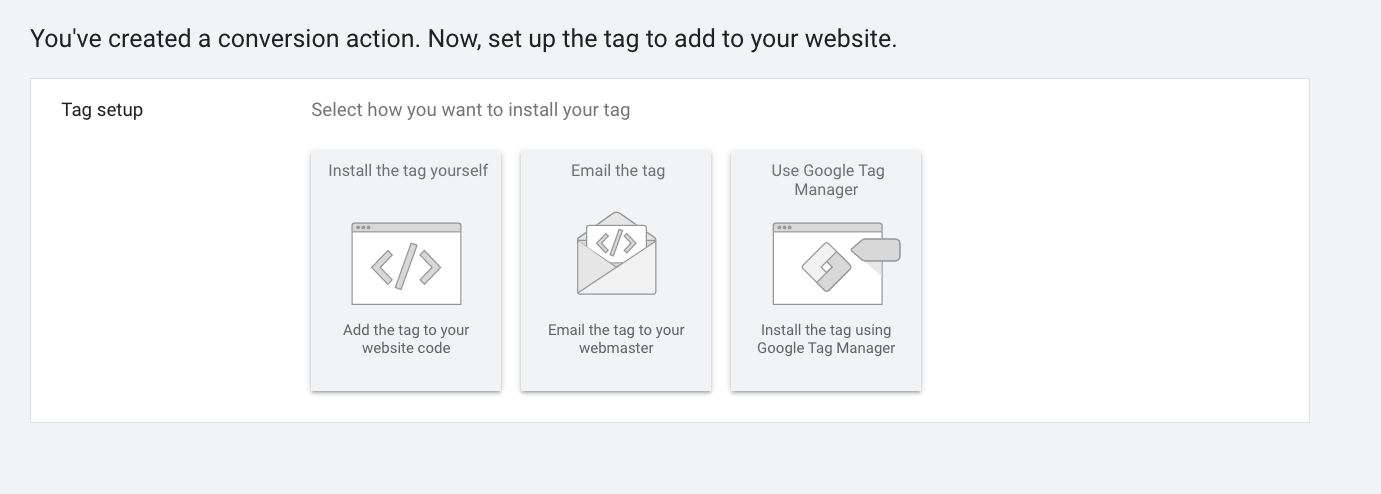
Method #1: Install the tag yourself
The actual conversion tracking code is made up of two parts:
- The Global Site tag
- Event snippet
#1 is the main tag and doesn’t change from page to page, while #2 sends the specific information.
The global site tag is the main way of how Google products communicate with your site.
It needs to be installed on all pages of your website. That way it’s able to track a visitor from the first click, all the way to the purchase page.
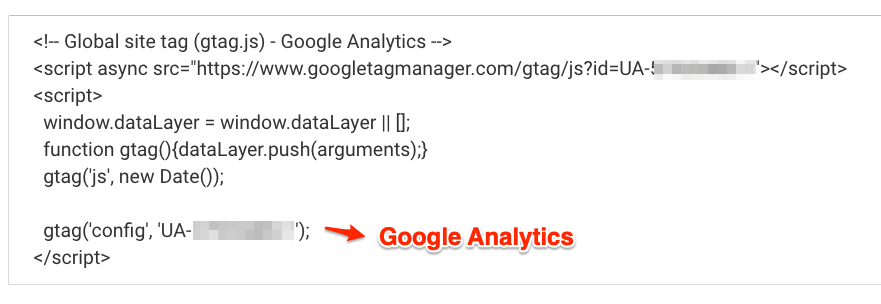
Here is what the Global Site tag looks like:
Ideally you want to place this in the <head> </head> section of your pages.
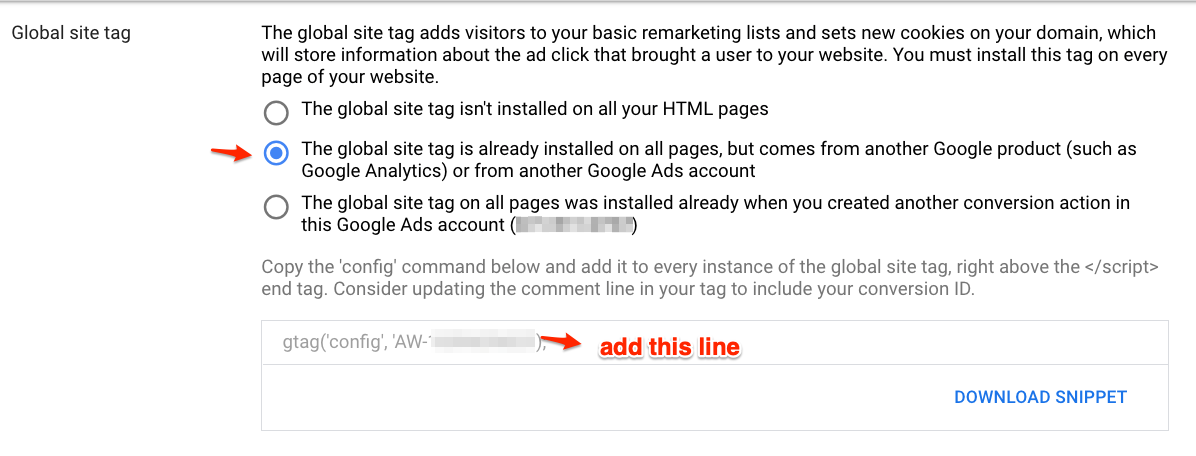
If you’re already using something like Google Analytics, you can slightly modify that tag to also send data to Google Ads.
Next, is the Event Snippet.
You can create a conversion on two different interactions:
- Page load: a conversion thank you page
- Click: add to cart for example
In this case, we’re setting up a conversion action for purchase, so we’ll pick the Page load option.
The Click option can be used if you’re setting up a conversion for an add to cart event for example.
Next is the actual Event snippet code:
To track purchases, we need to install this tag on the purchase completion page.
You can see that by default, the conversion value is set to 1, and there is no transaction id.
So when we install this on our site, we’ll need to make sure the correct conversion data is dynamically passed:
- Conversion value
- Transaction id: this helps with deduplication
For my Shopify store, that looks something like this:
<!– Event snippet for Purchase conversion page –>
<script>
gtag(‘event’, ‘conversion’, {
‘send_to’: ‘AW-1234567/ABCDE’,
‘value’: {{ checkout.subtotal_price | divided_by: 100.0 }},
‘currency’: ‘{{ currency }}’,
‘transaction_id’: ‘{{ order_number }}’,
});
</script>
The exact values for the value and transaction id depend on your eCommerce cart, but it will look very similar to the above.
Shopify has a good guide on how to get it working.
Other platforms are a lot less straightforward, requiring extra apps or plugins. See Method #3 further in this article for recommendations.
Method #2: Use Google Tag Manager
If you want to configure the Google Ads conversion tracking using Google Tag Manager, you’ll need to do three things:
- Get the values from Google Ads
- Create the Conversion tracking tag in Google Tag Manager
- Set up a Conversion Linker
1 – Get the values in Google Ads
You’ll need your Conversion ID and your conversion label.
2 – Create a Conversion Tracking tag in GTM
GTM has a preconfigured tag for Google Ads conversion tracking:
If you click that, you’ll go to the next step where you’ll need to enter the Conversion ID and Conversion Label.
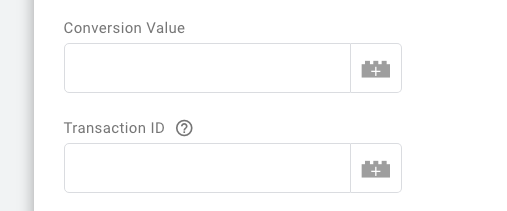
Similar to the manual installation, there also are a couple of dynamic fields you’ll need to configure:
Next, you need to pass the Conversion Value and the Transaction ID from your page into the data layer.
Then you’ll use GTM to set up variables based on the data layer information.
You’ll then use these variables to pass the conversion value and transaction ID.
To finish your tag setup, all you need to do is define the trigger when a conversion needs to be sent. This will be your purchase confirmation page.
(I realize that the steps above are simplifying things, so if you need help with Google Tag Manager, have a look at this tutorial).
Note that with Shopify, GTM can’t be loaded during checkout or on that page, so this method won’t work. (Unless you’re on Shopify Plus).
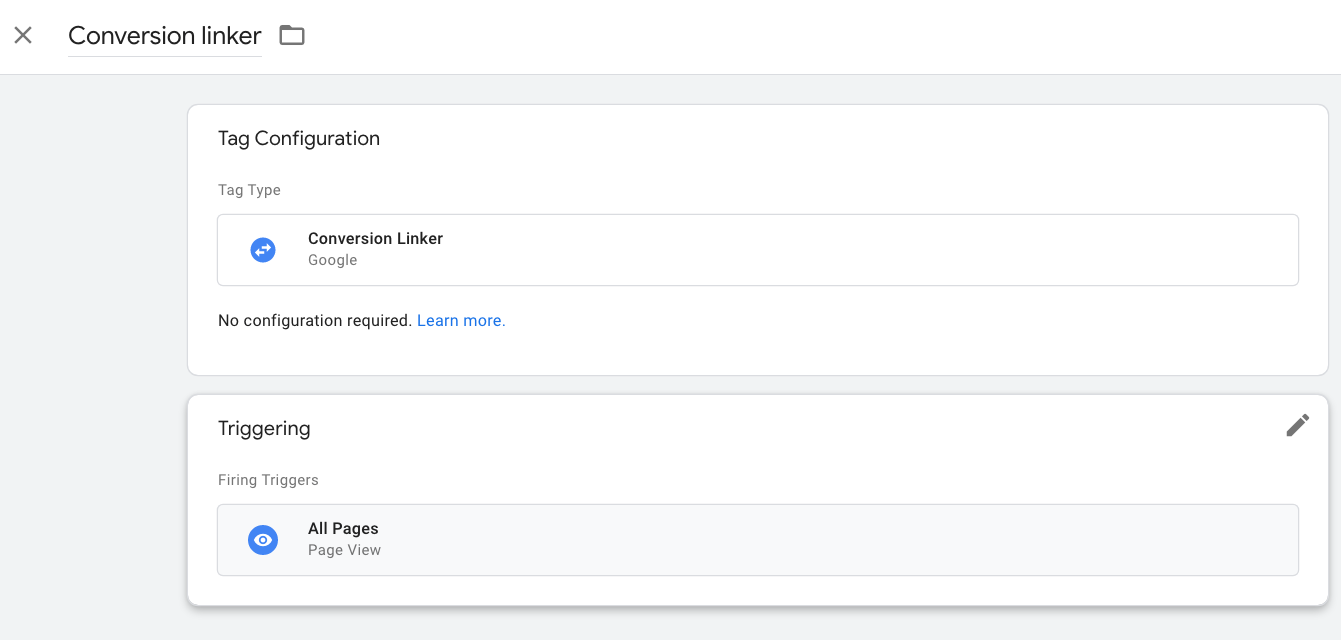
3 – Add a Conversion linker
The conversion linker is an extra tag that makes sure Google can track everything that happens from a click all the way to a purchase.
So to make sure it works correctly, trigger it on All Pages.
To complete the Google Tag Manager configuration, hit Publish on your container.
Method #3: Conversion Tracking tag Via Apps or Plugins
The previous two steps involve a lot of configuration.
So if you want to avoid messing around in your website’s theme or Google tag Manager, you can choose to use an app or plugin to help with the setup.
Here are a couple of recommendations for the most popular platforms:
Shopify:
WooCommerce:
- WooCommerce Conversion Tracking by Webdevs – link
- WooCommerce Conversion Tracking by woopt – link
- Enhanced Ecommerce Google Analytics Plugin for WooCommerce by Tatvic – link
Magento:
If you’re on Magento 2 and want to use Google Tag Manager, have a look at this excellent video tutorial.
Note: if you’re going to purchase an app, you might want to look into other common features like support for enhanced eCommerce and dynamic remarketing.
Importing Conversions From Google Analytics
Instead of tracking conversions by adding the Google Ads conversion tracking, you can also import them from Google Analytics.
We’ve already discussed the differences in the number of conversions and revenue between the two methods, so here I’m focusing on the actual setup.
First, you need to link Google Ads & Google Analytics:
You might have done this already during the setup of your Google Ads account. If you did, you’ll see that the accounts are “Linked” and there are some views, goals, and audience lists that are synced.
Next, you go to the Conversions overview and add a new Conversion Action.
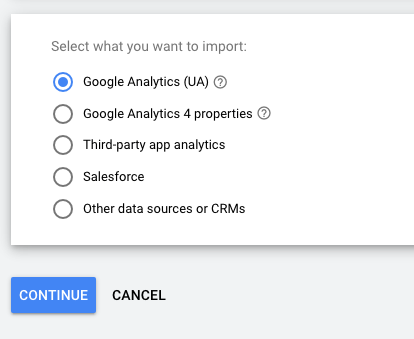
Click on Import. Then select Google Analytics (UA):
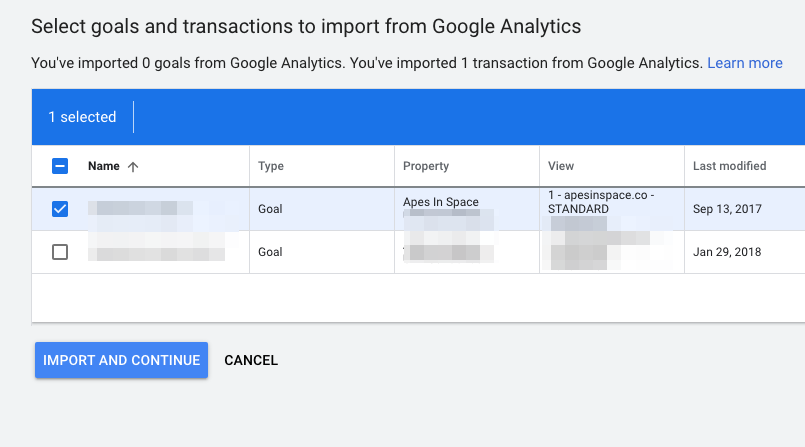
Select the goals you want to import:
That adds the conversion action to your account.
Note that this automatically uses the default settings. Look at the “Create a Conversion Action” section to explore whether different options make sense to you.
Repeat Rate And Conversions
In this last section of the article, I want to discuss the repeat rate.
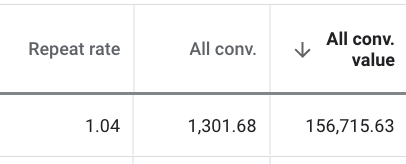
Repeat rate is how many conversions are being recorded for every interaction that led to a conversion.
This will depend very much on the type of conversion you’re tracking, and on the “Count” settings.
If people place multiple orders coming off one click, you’ll often see a repeat rate that’s over 1.
If you’re selling some kind of replenishable / subscription product (cosmetics, vitamins, etc.), people might come back later and purchase again. If it’s within the conversion window, it will influence the repeat rate.
But for most stores, repeat rates won’t be more than 1.1.
If that number is higher, there might be a problem with double firing tags or something.
One good tip is to add the order/transaction ID to your conversion tag. That will fix double counting.
Tracking Conversions In Google Ads
By now, you should have finished setting up your conversions in one way or another.
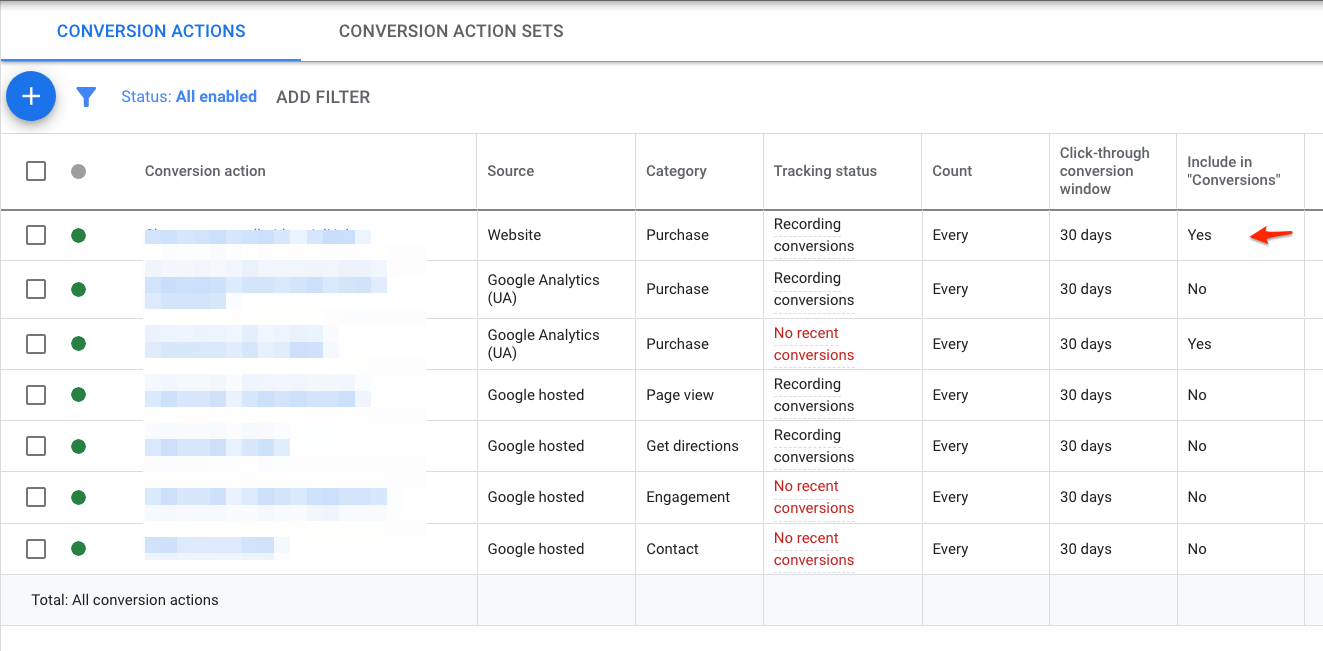
Your conversion actions overview might look something like this:
The account in the screenshot above has a lot of other conversions. Some are from other domains, others were created by Google to track things like Click to call, or Store visits.
The most important thing is to make sure conversions are being tracked correctly.
Ideally, you only have a single conversion action of the same type included. See the red arrow in the “Include in Conversions” column.
In the account above, that’s the only conversion that’s tracking purchases.
I hope this guide was useful in helping you to set up and troubleshoot conversion tracking in Google Ads.
If there is anything you’re stuck with, let me know in the comments!
